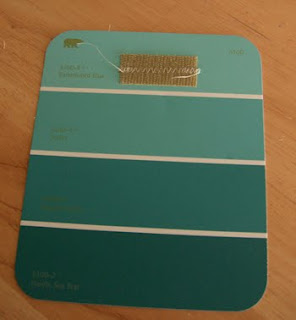
So, I actually didn't have any paint samples so I headed to Home Depot and got as many colors as I could.

Still puzzled as to what I did!?! Well I will tell you. I made a 4 in 1 game! Memory, colors, shapes, and letters. Complete with a game bag (but they would also make great gift bags too)


There was no white ones in the smaller size, so I had to cut down the bigger ones. That was kind of a pain, but I wanted a neutral color for the back ground.
For the back, I got 52 samples of the same color :) Hopefully Home Depot paint department isn't reading this. I glued it onto the back to cover up all that writing and make it uniform.
I cut out a bunch of different shapes from the bright paint samples and glued them onto the white paint samples. I added a little detail with permanent markers.
These 2 are my favorite. I think they turned out really cute.

Now my little woman and I can have fun and learn at the same time.

BUT, I couldn't stop there!!!! I HAD to make a little container for them. After I made this, I realized you could totally use this as a gift bag. You can make it any size by adding more samples. So, here is the tutorial for my paint sample bag.
I got 5 big paint samples: front, back, one for both sides, handle, and bottom
Sew Velcro onto the piece that will be the front of your bag.
For handle, fold one sample in half and cut off one section.
Zig zag around the open edge and sew Velcro on.
You will sew this part onto the piece that will be the back of your bag. Sew handle to the back side of paint sample.
For the sides you will cut one sample in half lengthwise. For the bottom you will cut one in half width wise.
Bend the bottom up of the 2 side pieces and front and back. This will give you a guide to where to place the bottom piece.
Sew bottom piece onto the back piece. The edge of the bottom (yellow piece) should line up with the fold you just made.
Sew the front piece onto the bottom.
Do the same with the side pieces. You should have something that looks like this.
Pinch the sides together and sew closed. You will do this on all 4 sides. The last side will be harder. I had to bend the paint samples a little to get the sides sew together.
You should have a game bag/ gift bag that looks like this now!

Now put your game pieces in it and enjoy. (Or present)


8 comments:
Love it! Totally gonna do this with Makenna!
How cool! School is starting so I need some educational ideas to keep Tyler busy. Thanks.
What a great idea! I love the little bag!
Great ideas! Super cute!
Great idea! And the bag is way too cute!
-Kara
http://littlelearnerslounge.blogspot.com
Very cute...especially like that whale!
Very cute, fun ideas! To spare the paint departments, you could just use decorative paper and cereal boxes and make the bag only out of paint samples.
This is adorable! The bag would be great for a housewarming :)
Post a Comment