


Before:

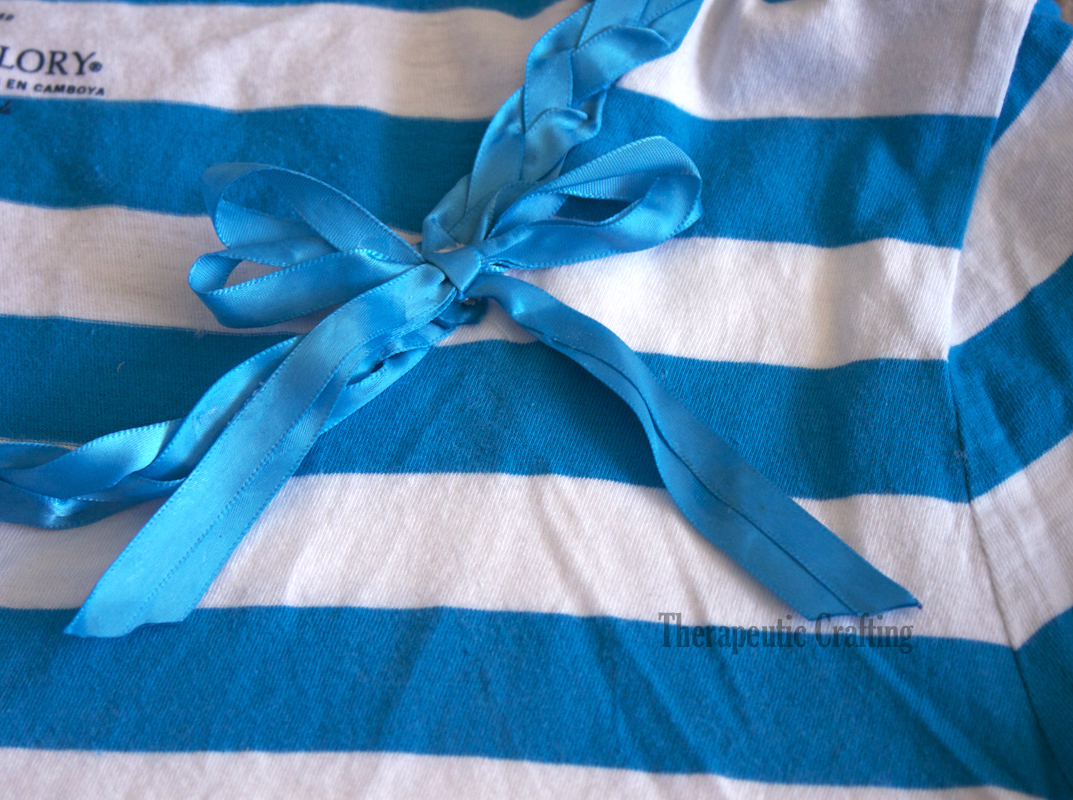
AFTER: braided collar and a bow. de-lish!

Gather up your supplies:
a shirt
ribbon
Iron
Iron on Liquid Stitch (make sure you get iron on because it makes this process a lot easier)!

Glob some liquid stitch onto a plate and get a small tip. I used the ball end of a straight pin.

First, I sewed the ends together, but you can just as easily use the liquid stitch and iron them together. Make sure to fray check the edges (take matches or a lighter to the ends) Then attach to a safety pin. It's like making a friendship bracelets when you were younger. Come on, you know you made them;) attached the pin to your ironing board. Start braiding.

After a few twists, put a little liquid stitch on the strands of your braid and iron down. This is to help your braid stay together as you work. It prevents from having the braid uneven from pulling. I did about 3 twists then add the glue. Continue doing this until your braid is long enough to go around the entire shirt.

Put the shirt on and mark where you want the bow to be at. This will give you your starting point.

Using the liquid stitch again, iron/glue the braid around the collar of the shirt. I spaced the dots of glue about every 3/4 inch. It's not a science, just where ever you think needs it.

When you get back to the start, use liquid stitch to secure braid. Cut off the extra, and fray check ends. Using liquid stitch, make sure the end is completely fastened down.

To cover the end of the braid, add a bow. I used left over ribbon. I didn't like how small the bow looked with just one strand so I did 2. But I might get some thicker ribbon and remake the bow. A rosette would be cute here too.
I really do like how simple and fun this is! Maybe a pop of color would have been fun, but I like it how it is!

3 comments:
I like your new collar and bow. Very cute and clever. Thanks so much for linking up. I will be sharing this post on my Facebook page as well.
That looks lovely!
-Ellie
http://mammymade.blogspot.com
Adorable.
Post a Comment