Showing posts with label no sew. Show all posts

Thursday, July 7, 2011

Shirt Refashion #5

Hey all! I am guest blogging over at Pocket Full of Pink today! So go check it out! And I just did and 1/2 of my guest post is missing:( so bad news. Oh well.

BUT we all know the real reason you checkout the post today.....yeah the shirt refashion. Are you having as much fun as I am with it!?! This one is completely NO SEW!


Well this one is fabulous. It's kind of a mix of a shirt I saw at DownEast. I love the rosettes around the collar.
Anthropology.  I love the sheer and thickness of it. I also like the way it goes around the entire neckline.


It's kind of a mix of 2 shirts. One from DownEast and one from Anthropology. I call it the Downology shirt:) I know, I know, a clever play on words.


It's the blue one from this style of shirt. (only the green one left to refashion. The pink was WAAAAAYYYYY too see through so it got returned.)


Here is the low down. I found this pre-made at Joann's. They had lots of colors to choose from. I just bought 3/4 yard and I had left overs.


Using the Iron Stitch again.


Starting at the shoulder, add a drop of liquid stitch and iron onto place. Continue all the way around the entire neck.


When you get to the other shoulder, just curve around for a second row around the neck.


When you finish the 2 rows, then add a 3rd row centered in the middle. I started lower on the shirt.


Step back and admire your work.

Friday, June 24, 2011

Shirt Refashion #4

Well here is my latest shirt refashion from my Wal-mart find. This one is a no sew!
Before:


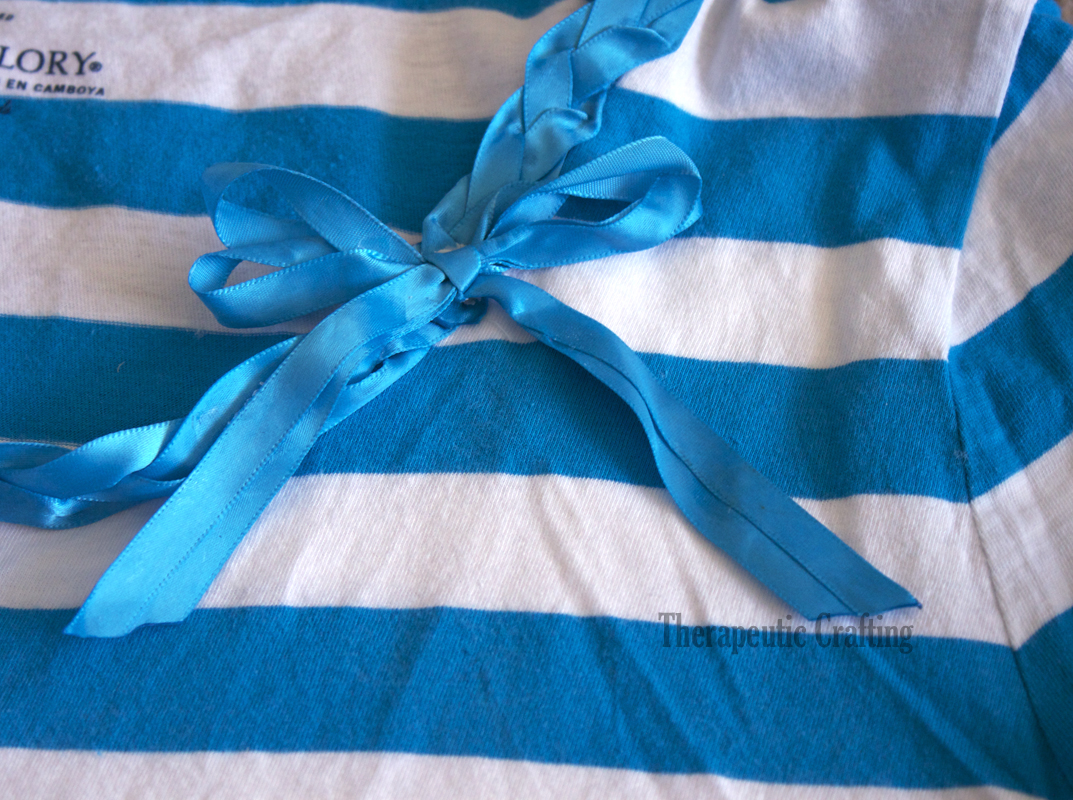
AFTER: braided collar and a bow. de-lish!


Gather up your supplies:
a shirt
ribbon
Iron
Iron on Liquid Stitch (make sure you get iron on because it makes this process a lot easier)!


Glob some liquid stitch onto a plate and get a small tip. I used the ball end of a straight pin.


First, I sewed the ends together, but you can just as easily use the liquid stitch and iron them together. Make sure to fray check the edges (take matches or a lighter to the ends) Then attach to a safety pin. It's like making a friendship bracelets when you were younger. Come on, you know you made them;) attached the pin to your ironing board. Start braiding.


After a few twists, put a little liquid stitch on the strands of your braid and iron down. This is to help your braid stay together as you work. It prevents from having the braid uneven from pulling. I did about 3 twists then add the glue. Continue doing this until your braid is long enough to go around the entire shirt.


Put the shirt on and mark where you want the bow to be at. This will give you your starting point.


Using the liquid stitch again, iron/glue the braid around the collar of the shirt. I spaced the dots of glue about every 3/4 inch. It's not a science, just where ever you think needs it.


When you get back to the start, use liquid stitch to secure braid. Cut off the extra, and fray check ends. Using liquid stitch, make sure the end is completely fastened down.


To cover the end of the braid, add a bow. I used left over ribbon. I didn't like how small the bow looked with just one strand so I did 2. But I might get some thicker ribbon and remake the bow. A rosette would be cute here too. Use liquid stitch to secure bow in place and you are done!  The bow didn't stay on with liquid stitch. So I ended up having to hand stitch it on. You could also hot glue the bow to a pin and pin it on.


I really do like how simple and fun this is! Maybe a pop of color would have been fun, but I like it how it is!

Wednesday, December 29, 2010

Reduce, Reuse, Recycle

Hubby was going through his drawer the other day and getting rid of shirts he doesn't wear anymore. I decided to get rid of a few myself. As I was looking through the shirts I realized that I could out them to good use in a project I have been wanted to make for a while.

My mom made this for me a few years ago out of a dish towel. We use it all the time, but I only have one.


Are you seeing where this is leading? Here is a simple NO SEW tutorial to turn old t-shirts into a great cloth protector. (my 5 year old still uses this when he has nice cloths on so he HATES when we call it a bib:) All you need are some old adult size t-shirts and scissors.


Lay the t-shirt out as flat as possible. The cut all the way up the sides and through the sleeve.


Open it up. I used our "bib" as a guide, but if you don't have one, you can use a hand towel instead.


Just make sure that there is 5 inches from where the collar is attached to shirt to bottom of towel.


If there is a tag make sure to cut it out.


Cut out the shape and you are DONE!!! Tomorrow I will be showing 2 simple variations you can do to these bibs.
 
Designed By Aqua Poppy Designs for Therapeutic Crafting.
© Copyright. All Rights Reserved.