Showing posts with label free pattern. Show all posts

Monday, October 10, 2011

Angry Bird Costume

I tried to talk my son into being a skeleton for Halloween. I have wanted to be a family of skeletons for a year. Anyway, my daughter was all for it, but my son refused. So, I changed my direction.

My son is obsessed with angry birds. This was a lot easier to do then I originally thought. It turned out awesome and I am soooooooo excited! And to be honest I was not loving the angry bird costumes for sale. They just look uncomfortable and weird.


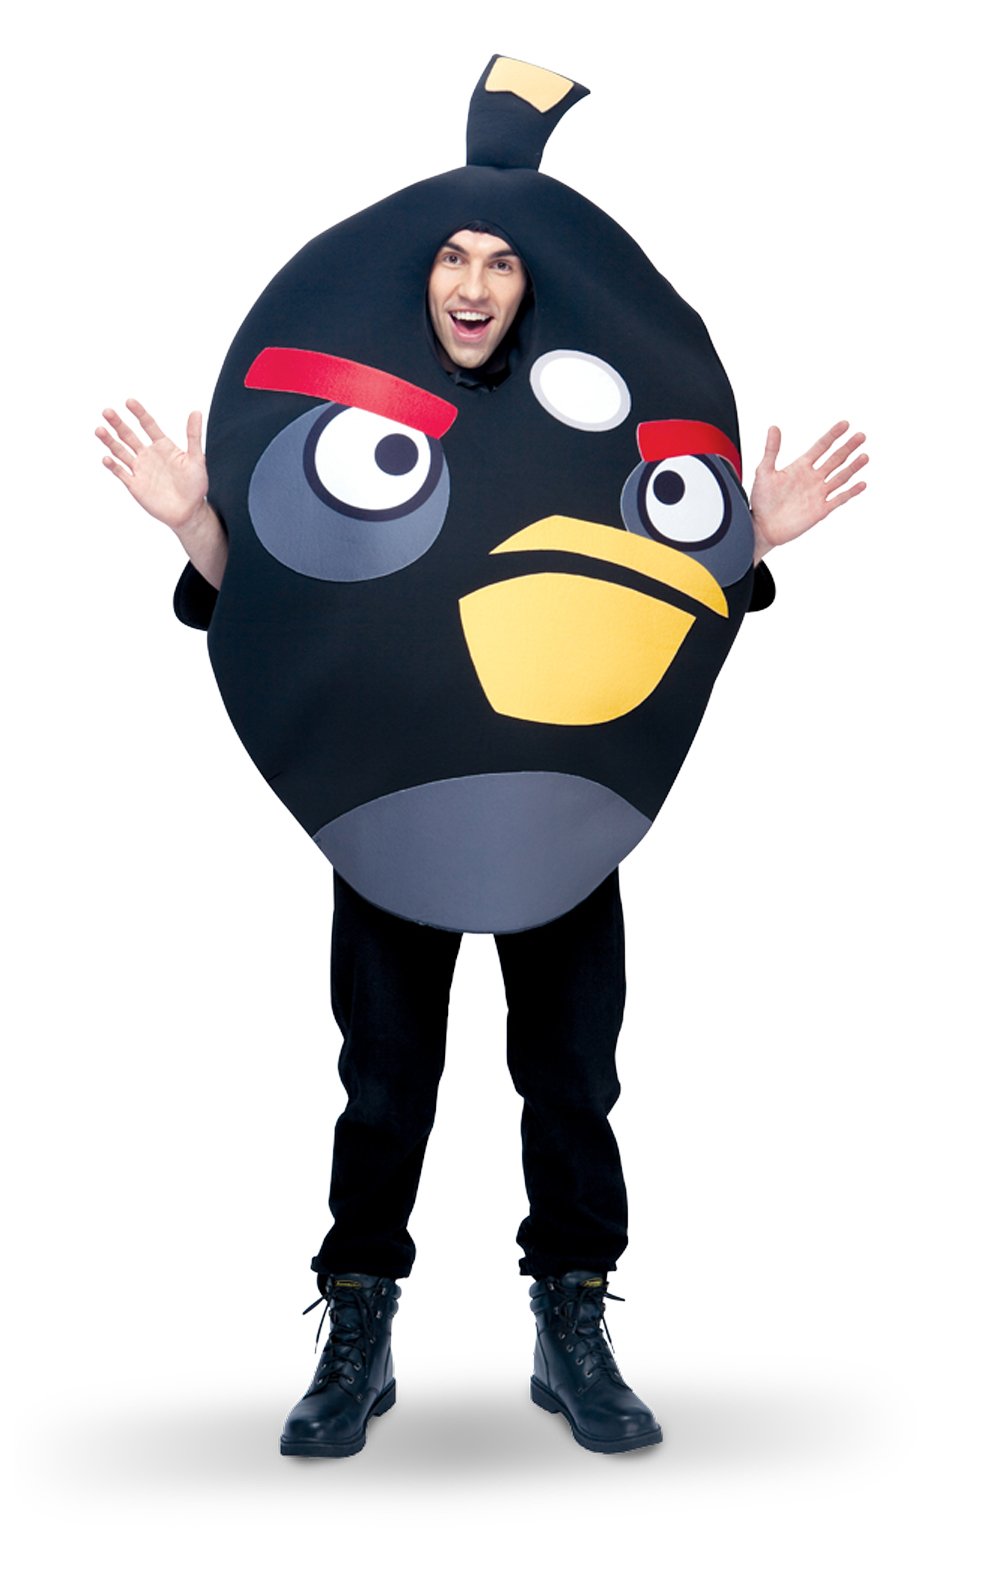


First gather your supplies. I got plain colored t-shirts in the color of the birds we wanted to be. I got 2 sizes bigger then we normally wear so we could stuff them a little. It is too hot here to put a lot of stuffing so if you want it bigger, go bigger:)  Hubby is red, son is black, mommy is yellow, daughter is pink pig (there is no pink pig, but she just wanted punk.  Plus I put a crow on her to be the 'queen' pig so just pretend she is in green).

You can use freezer paper and make a stencil and paint it on, use t-shirt vinyl, or use felt and sew the face on. I just hand drew the faces. I have included my drawings. I cleaned them up in Photoshop! If you would like to use them just click on the links below.

Black Angry Bird (black tail feathers)
Yellow Angry Bird (black tail and head feathers)
King Pig (I put on a squiggly pig tail)

I bought hubbies shirt at Wal-mart and it already had the angry bird face on it. So that is why there is no red angry bird pattern:)
Red Angry Bird (red head feathers, black tail feathers)


Cut out the faces you want and put on the front of your shirt. I made stencils from freezer paper and painted them on.


Make a casing at the very bottom of the shirt. I opened a little part of the hem and threaded elastic through it. Then sewed the opening closed again. This is to keep the stuffing from falling out:)


Make the tail feathers. I drew a pattern first then cut 2 pieces out of felt. I didn't include the hand drawn patterns for the tail or head feathers.


Sewed the 2 pieces together. Then flip them right side out and stuff. I used grocery bags.


Sew the tail feathers to the back of the shirt.


For the pig tail, I sewed a piece of bias tape together. Then I threaded a piece of pipe cleaner down it.


I sewed the tail on and then shaped it  into a little squiggly pig tail!


For the head feathers, I used head bands and hot glued the felt feathers onto it. I used the same concept to make the head feathers as the tail feathers, but I didn't stuff the head feathers.


For the pig crown, I used puff paint and put 3 blue dots and 3 white dots.


For the pig ears I painted the inside a lighter pink with puff paint.


For the bomb bird, I painted the top half yellow.


Here is our family of angry birds! I think our costumes are AWESOME and I like them WAY better then the store bought ones.

Wednesday, June 1, 2011

Vacation Crafts

While I was on vacation, I did have time to make a few crafts. I have been wanting to make my son a bow tie for a very long time. I also have been wanting to crochet. I just have to say that it was a lot easier then I expected. I am just learning to crochet, and these took me about 10 minutes to make. PLUS, I liked aspects from 2 different patterns so I combined them to make my own:)

I made THIS bow, thinking I would put it on a clip for my daughter. I decided I wanted it to be layered. So I changed the pattern to add a 2nd layer.


I found THIS adorable bow tie pattern and made it for my son. He didn't like how the tie touched his face. I didn't like how it had to be sewn together in the back because it added to the bulk and if my son pulled on it at all it would move and show the place where it was sewn together.


After make both I realized I need both of these to make the perfect bow tie for my son. So, here is how I combined both patterns, re-vampt it to fit my wants better and have the perfect bow tie for my son. We are both happier with the outcome!


Want the pattern to make your own!?! Well here it is! Now your little man can look oh so dapper too!
bottom layer
Row 1: ch 15, sc in 2nd ch from hook and in each ch across: 14 sc
Rows 2-6: ch 1, turn, working in back loops only, sc in each sc across: 14 sc
Border: do not turn, sc in along side of each row, in each ch across bottom, and along other side of each row.
Finish off.

For top layer
Row 1: ch 12, sc in 2nd ch from hook and in each ch across: 11 sc
Rows 2-4: ch 1, turn, working in back loops only, sc in each sc across: 11 sc
Border: do not turn, sc in along side of each row, in each ch across bottom, and along other side of each row.
Finish off.

For neck band:
"Measure your intended wearers neck. Chain the length of that person's neck circumference. Turn, and in second chain from the needle double crochet to the end. Tie off and weave in ends with a yarn needle. Add a button to the end. You don't have to make a button hole on the other end because there are a plethora of crocheted holes already there. It makes sizing a cinch!"

Place all the pieces in desired place and wrap yarn around all 3 layers. Pull tight and  for 1st few wraps then loosen to as you wrap until it looks good to you.

Here is a picture of the size difference of the 2.


Another variation using THIS pattern would be cut the bow part in half as follows


Bottom bow:
Row 1: chain 17
Row 2: turn, and in the second stitch from the needle single crochet to the end {16 stitches}
Row 3: turn, chain 2, double crochet to the end {15 stitches - the 2 chain counts as one to equal 16}
Row 4: turn, chain 2, half double crochet to the end {15 stitches - the 2 chain counts as one to equal 16}
Row 5: turn, chain 2, double crochet to the end {15 stitches - the 2 chain counts as one to equal 16}
Row 6:  turn, chain 2, single crochet to the end {15 stitches - the 2 chain counts as one to equal 16}


Tie off and weave in loose ends with a yarn needle.

Top Bow
Row 1: chain 15
Row 2: turn, and in the second stitch from the needle single crochet to the end {14 stitches}
Row 3: turn, chain 2, double crochet to the end {13 stitches - the 2 chain counts as one to equal 14}
Row 4: turn, chain 2, half double crochet to the end {13 stitches - the 2 chain counts as one to equal 14}
Row 5: turn, chain 2, double crochet to the end {13 stitches - the 2 chain counts as one to equal 14}
Row 6:  turn, chain 2, single crochet to the end {13 stitches - the 2 chain counts as one to equal 14}


Tie off and weave in loose ends with a yarn needle.

Follow same directions for the middle piece to connect all the pieces and neck band.

I haven't made one of these, but I am thinking it might be what I am looking for. BUT I would not do row 6 so it wouldn't touch my son's face.

Sunday, August 1, 2010

Dress

I made this adorable dress for my little misses. It was really easy. In fact, I even provided you with a tutorial!

This is what I did. I used THIS free pattern from Burda (NOTE: the pattern used in the tutorial is no longer available, but you can use THIS free pattern instead), but ONLY the body. Don't print pages 1-3 and 10-11. Piece it together. You can find the pattern for the collar in my free patterns under "sleeves and collar for little girls dress".  We won't be using that sleeve pattern. To see what pattern pieces should look like when put all together, see THIS post. Using yardage guideline, Find the yardage you need for the size you are making and divide that number by 3 for fabric A+B (A+B / 3). The number you get is how much fabric you will need of each fabric. I found a free fractions web cite for those who need a calculator. You can get it HERE


***Note: This is for a size children 3. If you are making it bigger, take the length you want the dress to be (starting at collar bone) and divide it by 4. This will give you the width you need to cut out your strips.***

Now, from 3 different fabrics, cut out your strips. Mine were 6 X 45 inches.

I wanted the dress to go below my daughter's knees so I added length. Arrange them in the order you want them to be.


Sew the strips together length wise.


Fold left salvaged edge just big enough for pattern to fit. Do the same for right salvaged edge.


Placing piece on fold, cut out 2 body pieces.


I cut mine out bigger than the pattern because I want a little gathering in the front. You can stay the same size as pattern or cut out about 1 inch wider around pattern piece.


You will need 4 collar pieces from main fabric and 2 from interfacing. 2 sleeve pieces form the main fabric. Notice what the sleeve looks like!?! I used a pattern for this sleeve, but I found a tutorial HERE for this type of sleeve. It's just 1/2 of an oval. After looking at her tutorial, I will be doing my sleeves like that from now on, it looks for finished:)

It will just cover your daughters shoulders.  Also, from one of the accent fabrics, cut out a 4 X 45 inch strip.


Iron the interfacing onto the wrong side of collar pieces. Sew shoulder pieces together.So you now have 2 separate squares (as seen below) With RST  Sew the inside of the squares together. Clip corners and flip right side out. Top stitch.


 RST sew the sides of the body of the dress together. Make sure the lines of each fabric line up.


Gather the top of dress until it fits the length of the collar.


Pin RST of collar to top of dress where you just gathered.


Flip dress right side out. Your dress is starting to take form:)


Make bias tape out of main fabric. Cut a 1 1/2 inch strip of fabric. Press in half


Open and fold edge to middle. Repeat process for both edges.


Fold in half again and press. You just made bias tape.


Fold ends in and top stitch.


Pin onto the bottom of the under arm of dress. Top stitch into place.


Finish curved edges of sleeve by folding over 1/4 inch press, fold 1/2 inch and sew in place. I surged the edges and folded over once.


Gather straight edge of sleeve


Pin to upper part of arm hole. Gather sleeve until it fits length remaining.


Stop each end at bias tape. Sew sleeve on to dress.


Top stitch sleeve and keep from flipping up.


Hem the bottom of dress by folding over 1/4 inch and press. Fold over again 1/2 inch and sew.


Create the bow by sewing RST. Leaving one end open for turning.


Turn right side out and press flat. Fold open end in and top stitch around the entire piece.


Tie into the bow size you want and attach to dress.


Then put the dress on your little lady and take pictures of her in her new adorable dress:)

 
Designed By Aqua Poppy Designs for Therapeutic Crafting.
© Copyright. All Rights Reserved.