We'll start with the sleeves. Find the middle of the sleeve and pin 4 inches out from middle on both sides.
Using a basting stitch, gather between 2 pins.
Pin arm pits RS.

Sew just the small straight part.
Hem the ends of the sleeve by folding over 1/4 inch, press, fold over 1/2 inch and press. Top stitch. It should look like this once you have finished.
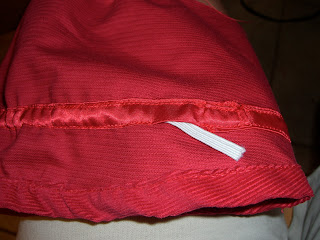
Using the bias tape you made, sew onto inside of sleeve to create a casing for elastic.
Leave a small opening on one side to thread elastic through.
Sew elastic together,
Close opening. and flip right side out.
With RST pin seam of armpit on sleeve to seam of armpit on dress. Gather sleeve to fit circumference of dress. Sew sleeve onto dress.
With remaining bias tape, tie 2 bows. Zig zag raw edges.
Sew onto dress. You can use your machine or hand stitch it on so you don't see the stitch.
Hem the dress by folding over 1/4 inch, press, fold over 5/8 inch, press. Top stitch in place.
Now put that dress onto your lil' woman and take pictures of her!
Without sash
With sash
I liked her dress better without the sash because the sash was too bulky for the material I was using.
Now, go take photos and upload it to Therapeuticcrafting's flicker group so EVERYONE can see! I will spot light them as they come in;)
You can find the previous parts here:
Part 1
Part 2
Part 3


1 comment:
This came out so cute! Thanks so much for sharing all your heard work with us, I'll be linking.
Post a Comment